Generating website using PWG
My Websites
First go to My Websites and click on the "New Website" button and provide a title and domain name for your website and click the icon for saving the website.

After that click on the Design link for designing your website.
Design
In design, you can modules for your website. A module will contain fields, actions and templates. In modules "User" module is different to other modules because it is considered as system module and user for authentication. So you are not allowed to modify many things in that module. Other modules are added as sample modules. You can delete those modules if you don't need and add your own modules as needed.
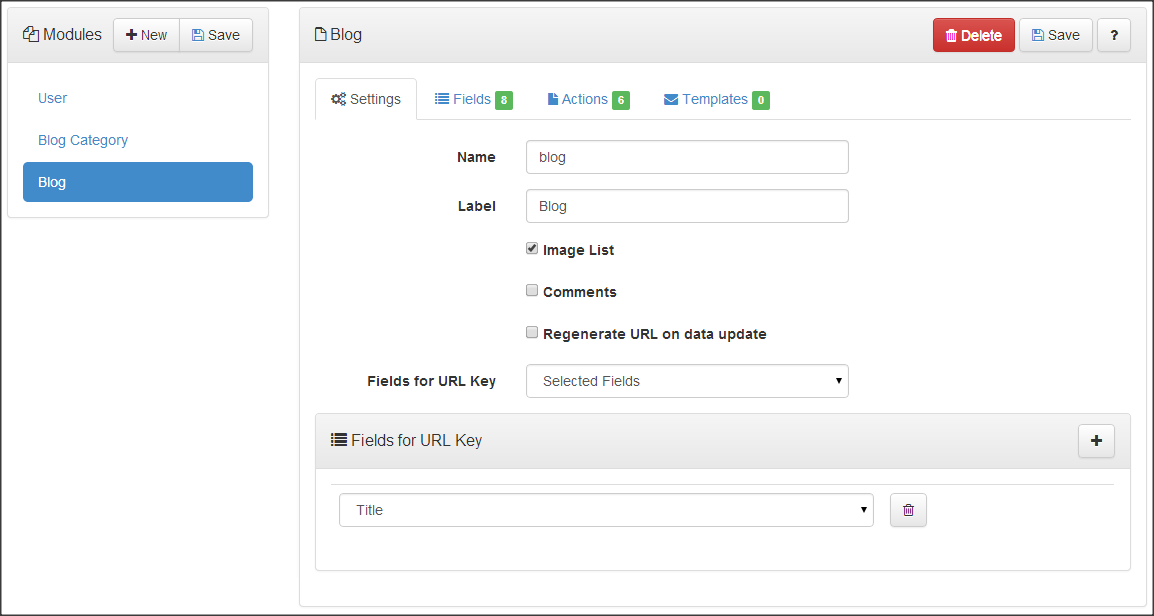
Settings
In settings you can enter the name and display name for the module. Also there are additional options "Image List" options provides feature to add list of images to an entry in that module through action. For having single image in the module entry don't use this option instead have one field with type Image.
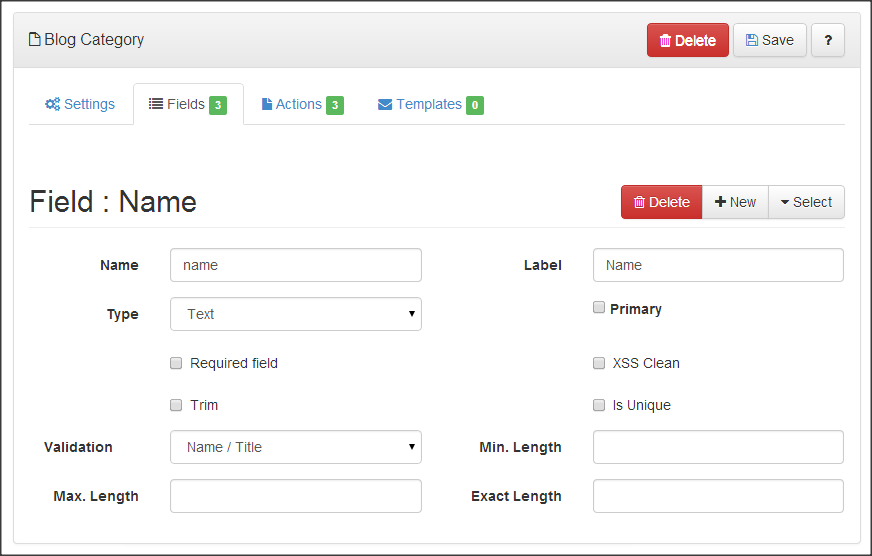
Fields
Fields are used to capture the data in the modules and represent columns in the module's tables.
| Field Types | How is it displayed in action? |
|---|---|
| Text, Decimal, Email, Number, Password |
 |
| Text:AutoSuggest |
 |
| Date, TimeStamp |
 |
| Currency |
 |
| Dropdown:Static, Dropdown:Dynamic |
 |
| Checkbox |
 |
| Radio Buttons |
 |
| File, Image |
 |
| Rich Text |
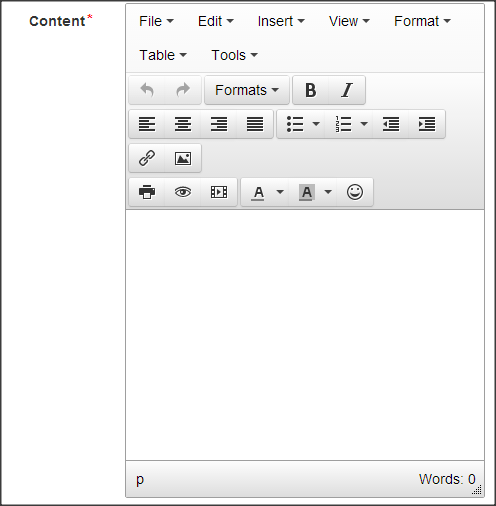 |
| Textarea |
 |
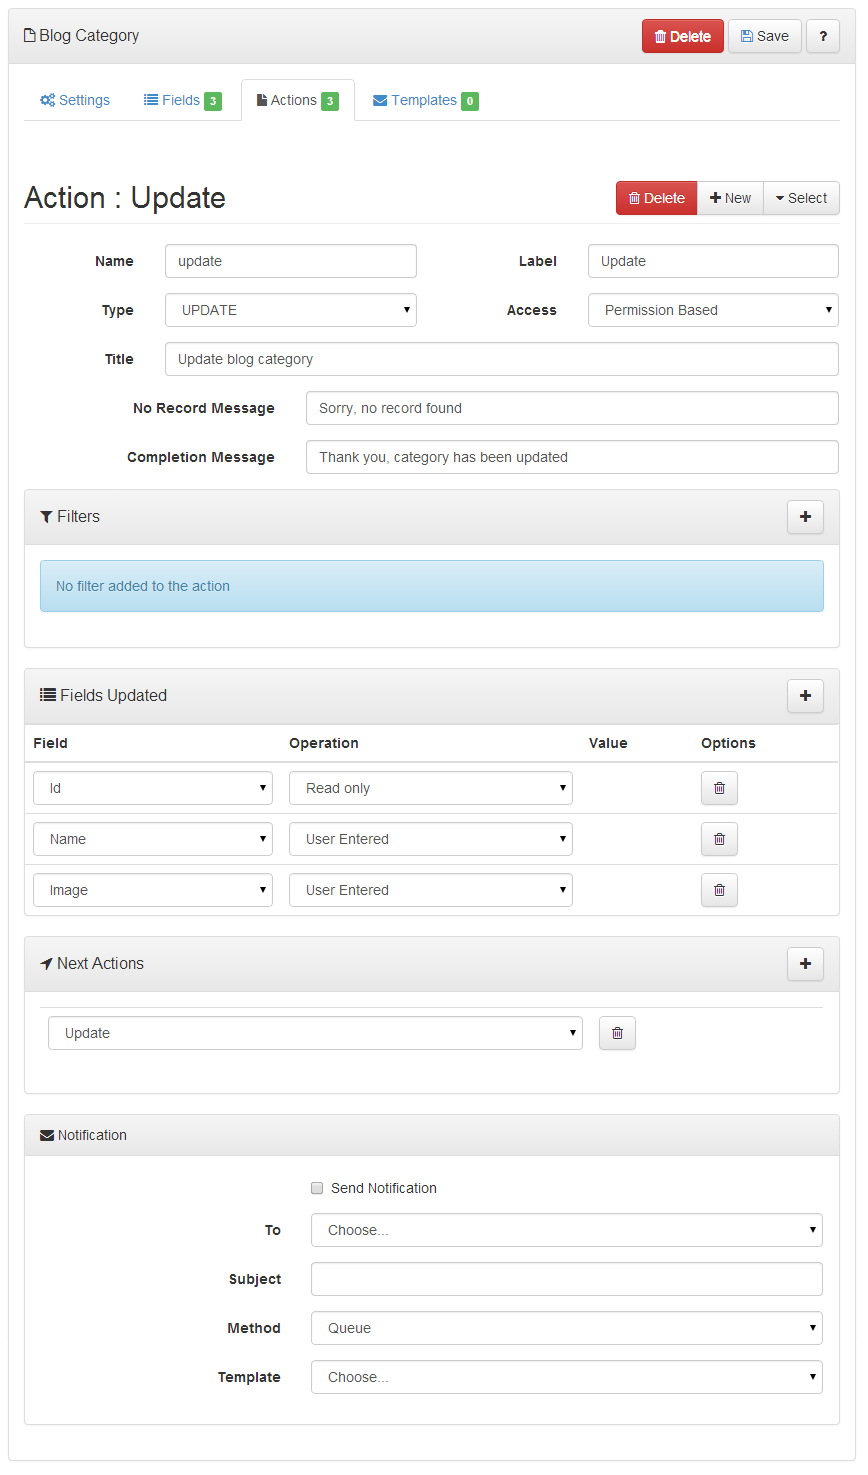
Actions
Actions are for manipulating or reporting on the data of the modules such as adding, updating, viewing, searching and reporting etc. You can reference templates for email notification when an action is performed.
Templates
You can create Email templates using the Rich Text Editor provided and use them in the post action notifications to send email on action completion.
Templates can contain dynamic fields and links to the actions in the current module.
Dynamic fields in email template
When editing the template content for adding dynamic fields use the format as [module:field]. The module name can be a current module or user module. User module can be used when sending email to a user by using the username field in the action. When an email field is used in To in the post action then system cannot replace the value with the user details.
An example template content with dynamic field
                Dear [user:name],
                Thank you for joining with us.
                .......
Dynamic links in Template
Adding links to some actions in the template is easy as adding fields. You can use the format as [link:action] to insert a link to the action.
An example template content with link to action
Dear [user:name],
                Thank you for joining with us.
                You can view your profile at [link:profile].
Using Templates in notification
In the action row just click the email icon to view the notification option dialog. You need to fill the following details for sending the notification.| To | This dropdown contains the fields from the current module that can be used as email targets. Only the field type Email and Username are displayed here. If you don't have any of these field type, will have to add one field before setting the notification. |
|---|---|
| Subject | Provide the subject for the email notifications |
| Template | This dropdown lists all the templates in the active module to generate the email content. |
| Method | Sending method can be either Queue or Instant. Queue is the way to deliver emails in smarted way from your website. |
Deployment
Deployment is the process of generating code for your design. After deploying the website, you can preview or download your the website.
Download
When you download your website you will get all the files in a zip file with a Readme.txt file in the root. Please follow the instructions in the file to make your website up and running.
File Contents
Below is the list of some files you get with PWG website download.
            myWebsite.zip
               |-application
               |  |-controllers
               |  |-config
               |  |  |-database.php /*Update your database settings here*/
               |  |  |-config.php
               |  |-helpers
               |  |  |-assets.php
               |  |  |-authentication.php
               |  |-libraries
               |  |  |-Smartcache.php
               |  |  |-Oauth.php
               |  |-models
               |  |-views
               |  |  |-template.php /*Main template file to change overall look and feels*/
               |  |  |-User
               |  |  |  |-login.php
               |  |  |  |-logout.php
               |  |  |  |-signup.php
               |  |  |  |-profile.php
               |  |  |-Module Name /*You get a folder for all the modules you create*/
               |  |  |  |-Action Name 1.php /*Actions will have dedicated view file folder*/
               |  |  |  |-Action Name 2.php
               |-assets
               |  |-css
               |  |  |-mystyle.css /* Update your website styles here */
               |  |-js
               |  |  |-admin.js
               |  |-images
               |  |  |-Module Name
               |  |  |  |-/*Files uploaded for the module goes here*/
               |-Script.sql/*SQL script to generate needed tables*/
               |-Readme.txt
You need to have PWG downloads before downloading the generated website. You can purchase downloads here.